
DataInlet Administration for Odoo
Documentation is currently available in English only.
On this page
DataInlet uses one connection for the entire Odoo database. In DataInlet Cloud, the account that approves the connection owns it, and imports use that account's billing setup and credits. Employees can start imports from Odoo without connecting separate DataInlet accounts. Each import uses the Odoo permissions of the employee who starts it. Reconnecting this database-wide connection affects every employee who uses it.
This documentation covers the standard workflow in which an employee starts the import from Odoo. If imports will instead be started in DataInlet, see the separate Inbound connectivity docs.
Before you connect
You need:
- system-administrator access in Odoo (see Roles and entry points);
- a DataInlet account that can approve a connection and is intended to own it;
- DataInlet AI Import and its DataInlet Foundation dependency installed for the standard Odoo import workflow; and
- the base URL of your DataInlet host if you use an on-premises deployment.
Get the addons from Odoo Apps and select the 18.0 or 19.0 version that matches your Odoo server.
Odoo must be able to reach the DataInlet service. The standard Odoo-initiated workflow does not require DataInlet to reach Odoo through a public URL.
What is sent to DataInlet
Connecting sends the database's name, instance identifier, and Odoo version to the chosen DataInlet service. Starting an import sends its source files and instructions. During processing, the connector supplies Odoo model and field information, import-related reference data, and validation and write results within the execution user's permissions. The connected service processes this information with its configured AI providers.
Connect DataInlet
1. Open the connection dialog
In Odoo, open Settings → General Settings → Integrations → DataInlet, then select Connect DataInlet.
If DataInlet AI Import is installed, the same dialog is also available at Settings → DataInlet → Configuration → Connection.
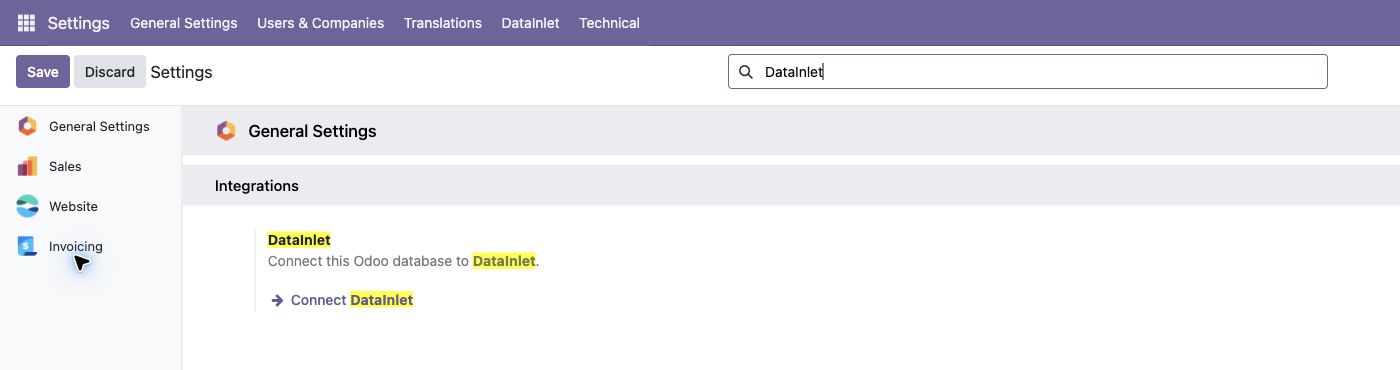
Search Settings for DataInlet to find the connection entry.
2. Choose the DataInlet host
Leave DataInlet URL empty to connect to DataInlet Cloud. For an on-premises
deployment, enter its base URL, including http:// or https://.
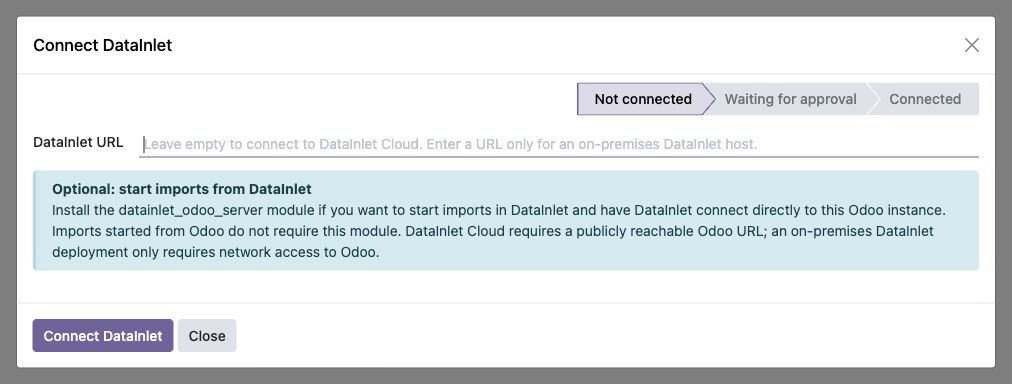
An empty DataInlet URL selects DataInlet Cloud.
Select Connect DataInlet. Odoo creates a short-lived authorization request and changes the status to Waiting for approval.
3. Open the authorization request
The pending page shows an authorization code, verification URL, and expiry. Use Authorize in DataInlet to open the complete authorization link. The link already includes the code; after sign-in, DataInlet loads the connection request directly.
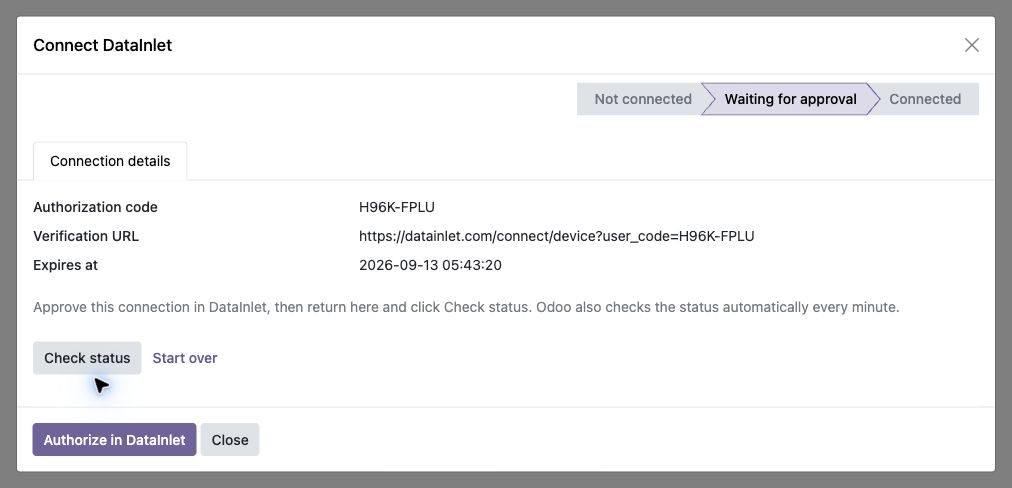
Open the request with Authorize in DataInlet. The example code shown here has already been used.
4. Approve the Odoo instance in DataInlet
Check that you are signed in to the DataInlet account intended to own this connection. Review the system name, instance reference, and software version. Reported URL is shown as — for the standard connection; Odoo sends this address only when inbound connectivity is enabled.
If the details identify the Odoo database you intend to connect, select Approve connection.
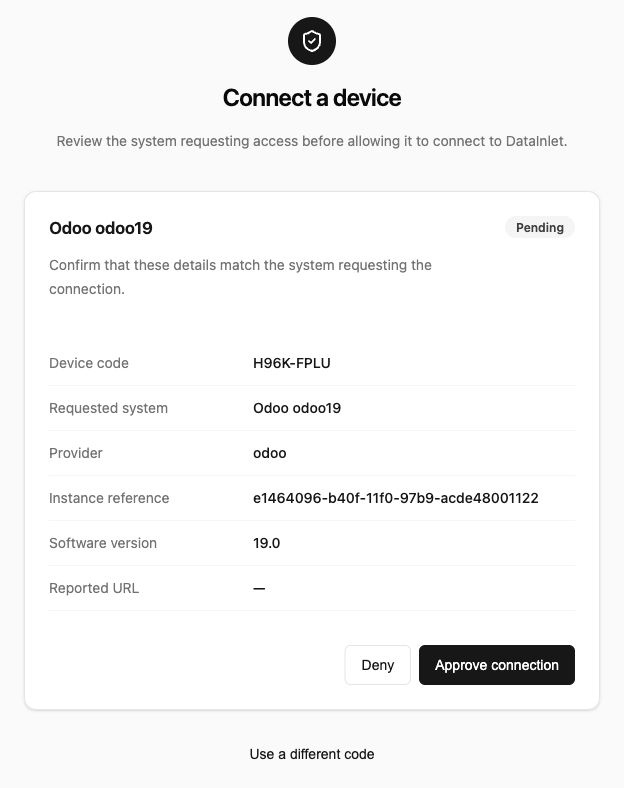
Review the requesting database before approving the connection.
The request is short-lived and can be used only once. Deny an unfamiliar request and start a new connection from Odoo if needed.
After approval, DataInlet tells you to return to Odoo to finish connecting.
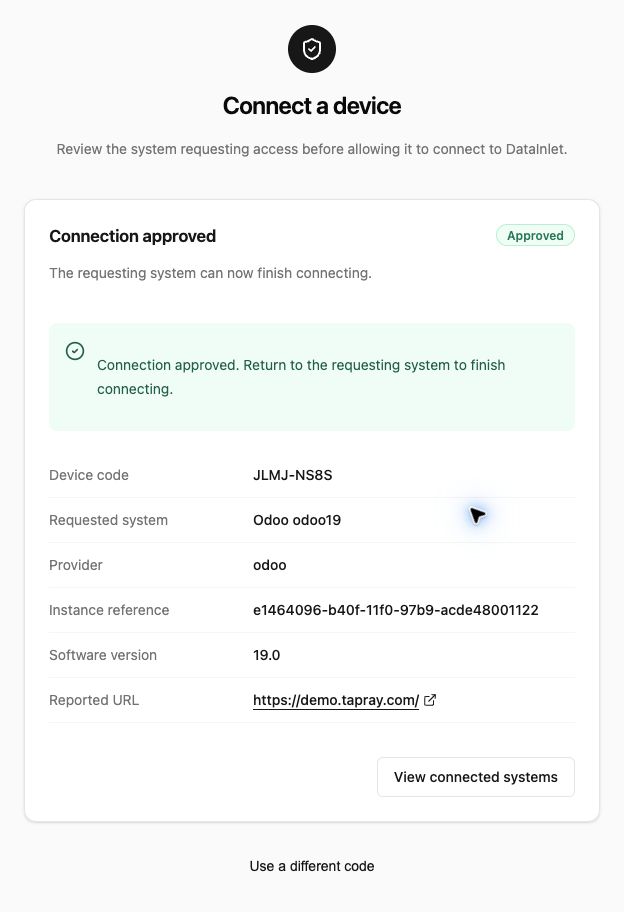
Return to Odoo after DataInlet confirms approval. This confirmation example has inbound connectivity enabled, so it also shows the reported Odoo URL.
5. Finish in Odoo
Return to the Odoo dialog and select Check status for an immediate refresh. When DataInlet AI Import is installed, Odoo also checks approved requests in the background, so the connection may already be complete when you return.
When the status is Connected, the connection is available to the database. If the connected service supports billing details, the Billing tab shows the current plan, shared credits, and a Manage billing link.
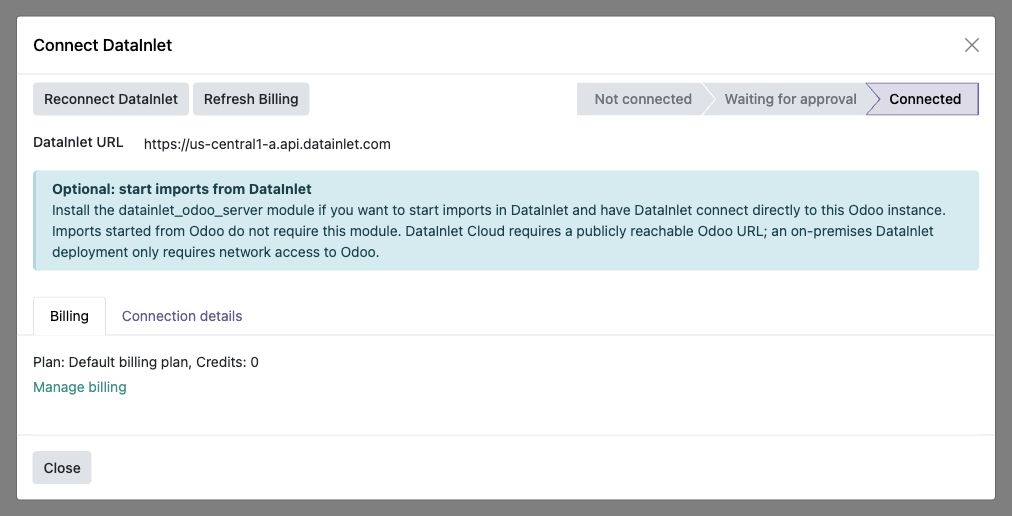
Connected confirms the database connection. The plan and credits depend on the approving account; imports require available credits.
Maintain the connection
Use Reconnect DataInlet to authorize the database again, including when changing the DataInlet account or host. Once connected, DataInlet URL shows the active service address. To change it, edit the URL and reconnect; editing the field alone does not switch the active connection.
Start over discards a pending authorization. During a reconnect, the existing connection remains in use until the replacement completes. Closing the dialog does not cancel an authorization already in progress.
Billing and credits
The Billing tab shows the connected account's billing information. Its credits may also be used by other imports or connections under the same billing account; they are not a separate allowance for this Odoo database or employee. On Odoo 18/19, billing details load after the dialog opens. The Billing overview shows when the displayed values were last updated. Use Refresh Billing for current values and Manage billing to open billing in DataInlet. Sign in with the account responsible for the connection's billing.
For an Inlet reporting a billing issue, Access Rights administrators can follow its Manage billing action when available. After resolving the issue, return to the Inlet and use Retry Launch if it is offered. For work already running, follow the current message in the Operator tab.
Inlets
Access Rights administrators can open Settings → DataInlet → Inlets to review imports across users. The list can be filtered to active work, items needing attention, completed or canceled work, and the administrator's own imports.
Regular internal users can read and control their own Inlets within their allowed companies. Access Rights administrators can review and control Inlets across users; background import work continues as its original user. See Review the result for write effects, cancellation, and record cleanup.
Import Profiles
Import Profiles provide reusable guidance and field rules for a particular Odoo record type. An Access Rights administrator can use Settings → DataInlet → Configuration → Import Profiles to add guidance, limit importable fields, or mark fields as required or strict.
When an active profile matches the target model and company, Odoo applies it to new Inlets automatically; users do not choose a profile in the upload dialog.
Use a profile when the default Odoo model metadata is not enough to express a business rule. A profile does not grant access, bypass record rules, or bypass Odoo validation.
Troubleshooting
| What you see | What it means and what to do |
|---|---|
| DataInlet is not connected to this Odoo database | A system administrator must complete the connection before employees can start imports. Reopen Import with DataInlet afterward. |
| Waiting for approval | Approve the request in DataInlet, then use Check status. Use Start over if the request expired or should be discarded. |
| DataInlet connection check failed | Odoo could not check the DataInlet server. Verify service reachability and use Retry connection check; the stored connection has been kept. |
| An import is denied by Odoo | Grant the execution user the required model and record access, or run the import as a suitable user. Reconnecting DataInlet does not change Odoo permissions. |
| An import reports a billing issue | Review the shared credits and follow Manage billing if available. |
For the employee workflow, see Import with DataInlet in Odoo. For support, contact [email protected].